Saint Aidan has been saved!
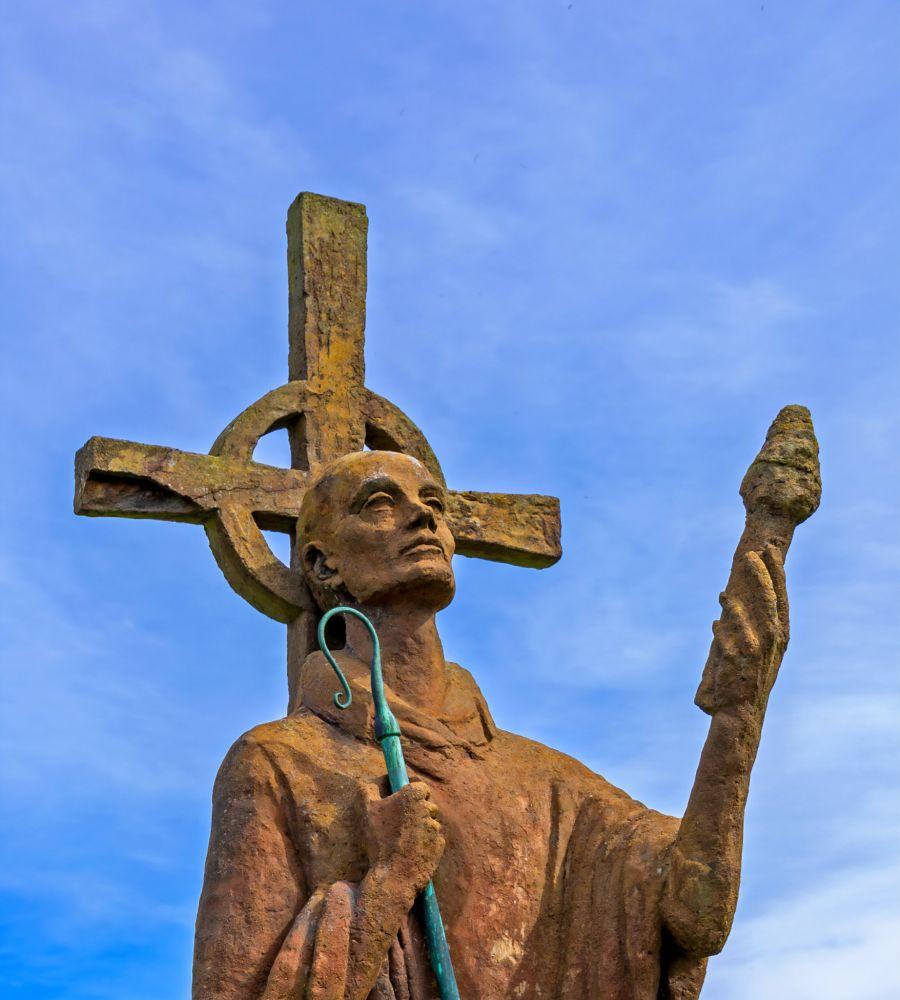
St Aidan's statue. The statue of Saint Aidan was created by Kathleen Parbury in 1958 and is a beloved destination for many of the visitors to the Island.
Being exposed to the weather for the last 64 years caused cracks and damage and we asked for your help to get it repaired. We needed to raise approximately £10,000 to cover expert restoration so that the statue could continue to be an icon of Holy Island.
We are extremely grateful and thankful for every donation received

So what was wrong with the statue?
Condition Report.
Sculpture dimensions: H3,400mm x W2,100mm x D2,200mm (h,w,d)
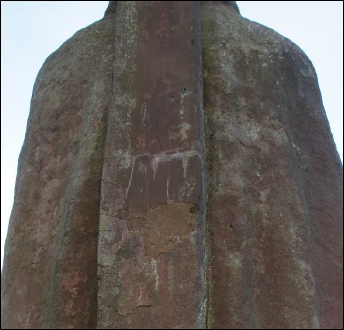
The sculpture appears to have been constructed as two main sections, upper and lower halves. The external surface of the sculpture comprises of a red concrete mixed with coarse sand. A number of failing previous repairs can be seen on the sculpture surface, particularly in the areas where stress cracks are evident. This is most evident at the rear of the sculpture where the cross joins with St Aidan’s back.

The sculpture was initially documented thermographically in an attempt to observe any cracks and fissures in the structure that may not be obvious to the naked eye, as well as any potential internal structures. Unfortunately, this analysis did not provide us with any significant information.

A core sample was taken from the dextral side of the sculpture just below the drapery at the right arm in order to determine whether or not the sculpture is hollow, and what the internal structure of the sculpture was constructed from. Once the core sample had been taken, an endoscope was then used to see if any further details could be observed inside the sculpture.

Following this process it was determined that the sculpture was in fact more or less solid throughout. There are occasional small voids but these are most likely around the supports as the cement layers were built up. It appears from the sample taken that the internal cement mix does not contain as much red and is a light grey colour. It also appears that the sand used internally is finer, however this may not be uniform throughout the rest of the sculpture
There was evidence of a wooden structure within the sculpture and, when checked with a metal detector, it became clear that there are also numerous areas where metal work has been used as an internal armature. Due to the dense nature of the concrete the metal detector will not pick up metal work set deep into the sculpture but it gives us an idea of any metal fixings close to the sculpture surface.
There is one area in particular where there is clear evidence of a metal fixing/armature within the structure of the piece. At the proper right side of the cross head it was clear to see the presence of a ferrous dowel protruding from the end of the crossbar. The evident corrosion of this fixing and the resulting ferrous jacking has caused a stress crack within the concrete.
There was clear movement at this section and as such it was decided that it was safer to remove the broken section and bring it back to our workshop for safe-keeping. This also allowed us to examine the concrete a little further and it was clear from this that the fixing was badly corroded and runs right through the crossbar.

Having seen the way in which the ferrous dowel runs through the crossbar there is little doubt that this same system has been used throughout the sculpture. There are a number of serious cracks throughout the sculpture and many of these will be as a result of ferrous jacking from the oxidizing internal fixing.
The following diagrams below display the areas of cracking and fracturing visible on the surface of the sculpture (red) as well as the areas of metal detection (green).
When comparing the present condition of the sculpture to the images taken during the site visit of January 2015 it appears that there has been relatively little deterioration. Structurally in the main the sculpture appears solid. There are a few small areas that appear weak and may need some work but only one main area that appears vulnerable. The main area of vulnerability is midway down the cross at the back of the sculpture where there are numerous cracks as well as previous repairs. There is considerable weight bearing down from the cross above which is most likely the cause. The cross also attaches to the head of St Aidan which is also bearing some weight. There is a slight crack here but structurally it appears to be sound.

What work was involved in repairing the statue
- The sculpture would initially be cleaned with nylon brushes and potable water. This will allow for all cracks and fissures to be seen and it will also allow for repair mortars to be matched to the original surface colour.
- Remove failing previous repairs and assess ferrous dowel. Brush back corroding dowel to sound metal where accessible and treat with corrosion inhibitor. Apply layer of Paraloid B44 (12% w/v in acetone) to act as an isolating barrier. Remodel new repair using St One repair mortar pigmented to match the surrounding cement colour/texture.
- Structurally stabilize areas where necessary by way of drilling and pinning / setting in dog cramps. Areas will be pinned/cramped using stainless steel dowel (grade 316) set in position with polyester resin. The new fixings would then be covered with pigmented St One repair mortar or pigmented Paraloid B72 (12% w/v in acetone) mixed with sand dependant on depth of fill.
- All cracks and fissures would be filled with pigmented St One repair mortar or pigmented Paraloid B72 (12% w/v in acetone) mixed with sand dependant on thickness and depth of crack.
- Remove bronze crozier from sculpture and bring back to workshop. Treat the bronze with a chelating agent of 5% tri ammonium citrate in de-ionized water. This acts to inhibit future corrosion of the piece. Carefully heat the bronze before applying a clear coat of carnauba wax. Allow the bronze to cool before buffing to harden the wax. Apply first coat of clear microcrystalline wax and buff. Apply second coat of microcrystalline wax and buff.
- Repointing of plinth with St One repair mortar.


